
Getting a flat tire while driving can be stressful, especially if you are far from home or traveling on a busy road. However, knowing how to change a flat tire safely can save you time, money, and frustration. Every driver should understand the basic steps involved in replacing a damaged tire with a spare.
Flat tires can happen due to sharp objects on the road, worn-out tires, sudden pressure loss, or potholes. Instead of waiting for roadside assistance, learning the proper technique allows you to handle the situation confidently. This guide explains the top 10 safe steps to change a flat tire, even if you are a beginner.
1. Find a Safe Location to Stop
The first and most important step when you notice a flat tire is finding a safe place to stop your vehicle. Driving with a flat tire can damage your wheel rim and make the situation worse, so slow down gradually and pull over as soon as possible.
How to Change a Tire Like a Pro: A Step-by-Step Guide
Look for a flat, stable surface away from traffic. A parking lot, wide shoulder, or quiet street is ideal. Avoid stopping on curves, hills, or narrow roads where other vehicles may not see you clearly.
Once you stop, turn on your hazard lights so other drivers know your car is stationary. This small step significantly increases your safety, especially at night or in poor weather conditions.
2. Turn On Hazard Lights and Apply the Parking Brake
Before stepping out of the vehicle, make sure your car is fully secured. Turn on the hazard lights immediately if you haven’t already done so. This warns approaching drivers that your car is experiencing trouble.
Next, apply the parking brake firmly. This prevents the vehicle from rolling while you are changing the tire. Even on slightly sloped roads, the parking brake helps keep the car stable.
If you have safety triangles or reflective cones in your emergency kit, place them behind your vehicle. This adds another layer of protection while you work.
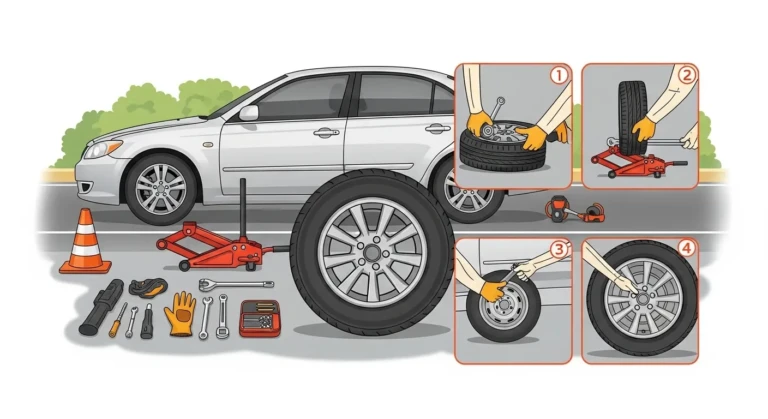
3. Gather the Necessary Tools
Most vehicles come with a basic tire-changing kit. These tools are usually stored in the trunk under the floor panel or near the spare tire. Before starting the process, make sure you have everything ready.
The essential tools include:
- Spare tire
- Car jack
- Lug wrench
- Vehicle owner’s manual
Some drivers also keep gloves, a flashlight, and a small mat in their car. These items make the process easier and more comfortable, especially if the road surface is dirty.
Having all the tools ready saves time and helps you stay focused on the task.
4. Loosen the Lug Nuts
Before lifting the car with the jack, you should slightly loosen the lug nuts on the flat tire. The lug nuts are the bolts that hold the wheel firmly in place.
Use the lug wrench to turn the nuts counterclockwise. At this stage, you only need to loosen them slightly, not remove them completely.
Loosening the lug nuts while the tire is still touching the ground makes the process easier. If you try to remove them after lifting the car, the wheel may spin and make the task more difficult.
5. Position the Car Jack Correctly
The car jack is used to lift the vehicle so the flat tire can be removed. However, it must be placed in the correct position to avoid damaging the car.
Most vehicles have designated jack points located just behind the front wheels or in front of the rear wheels. You can find these locations in the owner’s manual.
Place the jack under the correct lifting point and ensure it sits firmly on the ground. A stable jack placement is essential for your safety during the tire change.
6. Lift the Vehicle Carefully
Once the jack is properly positioned, begin lifting the vehicle slowly. Turn the jack handle clockwise until the flat tire is about two to three inches off the ground.
Avoid lifting the car higher than necessary. Raising it too much can make the vehicle unstable and increase the risk of accidents.
During this step, stay alert and keep your body away from under the car. The jack is designed to lift the vehicle but not to support people underneath it.
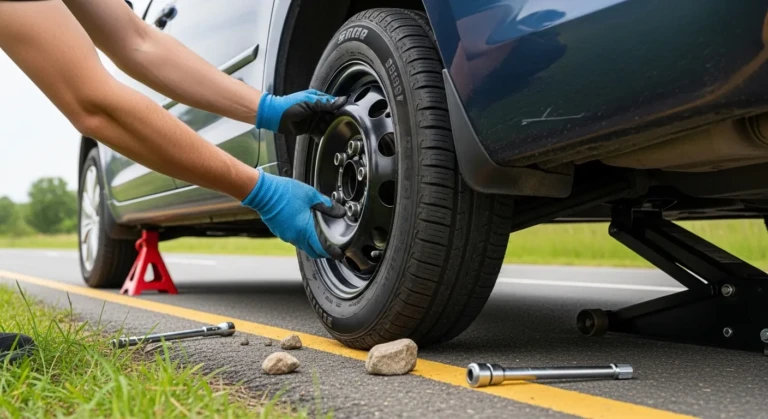
7. Remove the Flat Tire
Now that the vehicle is lifted, you can remove the loosened lug nuts completely. Place them somewhere safe so they do not roll away.
After removing the nuts, carefully pull the flat tire straight toward you. Sometimes the wheel may stick due to rust or pressure, so you might need to gently wiggle it to release it.
Set the flat tire on the ground nearby. This ensures you have space to install the spare tire without obstacles.
8. Install the Spare Tire
Take the spare tire and align it with the wheel bolts. Slide the tire onto the hub until it fits securely in place.
Once the spare tire is positioned correctly, place the lug nuts back onto the bolts. Tighten them by hand first to hold the wheel in position.
Hand-tightening the nuts ensures the wheel is centered correctly before using the wrench to secure them firmly.
9. Lower the Vehicle and Tighten the Lug Nuts
After installing the spare tire, slowly lower the vehicle using the jack until the tire touches the ground completely.
Once the car is back on the ground, use the lug wrench to tighten the nuts fully. Tighten them in a star pattern rather than going around the circle. This method ensures even pressure on the wheel.
Properly tightened lug nuts help keep the spare tire secure while driving.
10. Check the Spare Tire and Drive Carefully
After completing the tire change, put all tools and the flat tire back in the trunk. Take a moment to check that everything is secure before continuing your journey.
Keep in mind that most spare tires are temporary or “donut” tires. They are not designed for high speeds or long distances. Usually, you should drive below 50 mph and replace the damaged tire as soon as possible.
Visit a tire repair shop or mechanic to fix or replace the flat tire. Driving safely after installing the spare ensures you avoid further problems.
Final Thoughts
Knowing how to change a flat tire safely is an essential skill for every driver. Flat tires can happen unexpectedly, but with the right knowledge and preparation, you can handle the situation calmly and efficiently.
By following these 10 simple steps, you can replace a damaged tire and get back on the road without relying on roadside assistance. Keeping basic tools in your car and practicing the process ahead of time will make you more confident when an emergency occurs.
Remember, safety should always come first. Choose a safe location, use proper tools, and drive carefully after installing the spare tire.